Buttery Scones for Afternoon Tea

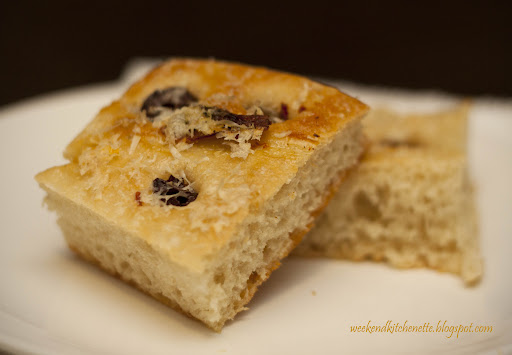
There is something about afternoon tea. Afternoon tea is definitely designed for the Missy. It is considered to be a ladies social occasion. I could imagine myself sipping chamomile tea from floral English tea cups and sliding finger sized pastries off the tier-plates with my girl friends on weekday afternoon, catching up on the good old times. Here in Singapore, we commonly know that afternoon tea as high tea. Unfortunately, Singaporeans have got it all wrong. The luxurious afternoon tea is traditionally known as low tea: tea served with dainty food on low tables at mid afternoon. On contrary, high tea is traditionally for the working class. It is a meal of meat and other heavy food served on high table after work. 


So bring out the scones and let’s have some low tea! 

Remember, scones are not supposed to be hard and dry. Good scones are buttery, light and tender. I like my scones warmed, glazed or served with jam or whipped butter. It is not easy to find good scones here. At least, I haven’t. That is why I made these today. So now you know where to get the best scones? @ weekend kitchenette!

I learnt this marvellous recipe while I was in Cambridge, Massachusetts, from a wonderful neighbour who was learning to be a pastry chef. She gave up her regular job to pursue her passion in the Cordon Bleu, Boston. She shared that her dream was to set up her own bakery in her home town in Utah. Interestingly, she was also my kickboxing instructor then. 


The tip to tender scones lies on the amount of mixing. The more you mix, the tougher it gets. So perhaps that explains why commercially made scones are like stones. Simply because they are machined mixed.  


Recipe (makes 8 pieces) 

Ingredients:

  • 2 cups Plain flour
  • 1/4 cup Caster Sugar
  • 2 1/2 tsp Baking Powder
  • 1/4 tsp Salt
  • 1/2 cup (113g) Unsalted Butter, cold
  • 1 cup Whipping cream, cold
  • 1 egg, lightly beaten
  • Sugar to sprinkle

Steps:

  1. Mix the dry ingredients together. 
  2. Using a food processor, chop the butter with the dry ingredients until the butter is about the size of half a pea, coated with dry ingredients. 
  3. Pour the mixture into a mixing bowl. 
  4. Add the whipping cream. Mix lightly. 
  5. Pat the dough into a disc shape on a table top. 
  6. Cut the dough into 8 pieces. 
  7. Brush the dough with egg wash and sprinkle with sugar. 
  8. Bake the scones at 215 degree Celsius for 14 minutes or golden brown. 
  9. Cool them on a cooling rack. 


Look at the soft in the inside and toasty on the outside!! Yums!

French Onion Soup with Cheese Gratin

I am a soup person. I love soups. I will order soup as a side in restaurants even though it is scorching hot outside. Be it cream, clear, bisque or consomme. You have it, I get it. However, I didn’t quite understand why the ‘French’ like tonnes of onions in their soup? What is so unique about French Onion Soup? Just onions for soup? Is it possible for onions to stand out on its own. Well, I have to convince myself. 

Recently I was at a French restaurant along Duxton and they only had French onion soup for their lunch menu. Well, I thought it was time to give onions a chance. So I did. Wow! The caramelized onions provided a layered and complex depth to the taste. The gruyere cheese and  toasted bread enhanced the texture and taste to a humble soup. Hmm…mm… onions  surprised me. 

For the next few days, I was thinking about it and flipped Julia Child’s cookbook. Yes, let’s make it!

Recipe (Serves 6)
Ingredients

A) Onion soup
  • 680g Yellow onions, thinly sliced
  • 40f Unsalted Butter
  • 1 tbsp Olive oil 
  • 3 tbsp Plain flour
  • 1.9 litres Chicken Stock  
  • 1/2 cup White wine
  • 3 tbsp Cognac
  • 1/2 tsp Salt 
  • 1/2 tsp Sugar
  • A dash of pepper
Steps:
  1. In a heated large pot, melt the butter with oil over low heat. 
  2. Add in the onions and stir well. 
  3. Cover for 15 minutes and let it cook slowly. 
  4. Uncover the pot, increase the heat to medium and add in salt and pepper. 
  5. Stir frequently for about 30 minutes or until onions turn deep golden brown. Scrap the bottom of pot to prevent burning as the onions caramelized. 
  6. Add in the flour and cook for another 3 minutes. 
  7. Add in wine and stock. 
  8. Season with salt and pepper. 


B) Cheese Gratin

  • 2 cups Grated Gruyere 
  • 1 French bread, cut into 0.8 inch thick rounds and toasted till hard
  • 2 tbsp Butter
Steps:
  1. Preheat the oven to 170 degree Celsius. 
  2. Divide the soups into 6 soup bowls. 
  3. Add 1 tsp of cheese into the soup. 
  4. Spread some butter on toast. 
  5. Float a couple of toasted bread over the soup and top it with your preferred amount of cheese. 
  6. Bake it for 15 minutes and finish it off over a broiler/grill at high heat to brown the cheese lightly. 
  7. Serve while it is hot. 

Do take note that the soup will thickened during the baking process. Enjoy!

Roti Jala to Celebrate Hari Raya Aidilfitri

Selamat Hari Raya Aidilfitri to all my Muslim friends and readers! 

I am glad to see and observe the buzz and joy of the festive occasion in Singapore. My Muslim friends celebrate the end of the fasting month on this day. Many others, including me, irregardless of race and religion join in to celebrate the special day by enjoying delicious Malay delicacies and even visiting our Muslim friends

I made Roti Jala, yellow lacy crepes usually served with curry.  The lacy crepes are created by having the batter through a special scoop made of many small funnels. With a few circular movements, the lines are drawn on the greased sizzling pan and batter get cooked quickly. In a matter of minutes, pretty looking crepes are ready to be folded into rolls or triangles and plated. The crepes are best eaten hot with thick curry. However it is up to your preference and that day I wanted something lighter!

Recipe
Ingredients: 

  • 1 cup all-purpose flour
  • 1 egg
  • 1 cup Carnation milk / Coconut milk
  • Water
  • A pinch of turmeric powder
  • 1/4 tsp Salt
  • 1/4 cup Cooking Oil
  • Pandan Leaves, tied into a bundle to serve as a oil brush
Steps:
  1. Mix flour, egg and milk well. 
  2. Add water slowly to the batter to attain a consistency to allow batter to flow smoothly through the Roti Jala funnel. 
  3. Grease a heated pan using the pandan oil brush lightly. 
  4. Using the roti jala funnel, drizzle the batter over the hot pan. 
  5. Using a spatula, carefully lift up the crepe when it is set. Fold it into desirable shape. 
  6. Serve with curry. 


Crispy Layered Curry Puffs

I grew up in a Singapore heartland and I could get simple and tasty food in the nearby coffee shops and eateries. I could remember Hainanese chicken rice was scrumptious and serving was generous. It can beat the Mandarin Chatterbox $25 chicken rice anytime! My favourite was the Fried Hokkien noodles. They were fried upon order and watching the uncle frying the noodles was truly an eye-treat. Food then was authentic and delicious.  


Today, food is fancier in presentation. Food appreciation is elevated to include different senses. Beside taste, it must be a feast to the eyes and scent to the nose. The recent craze of curry puffs has invited a few brands to compete for a market share. With competition, curry puffs have evolved from the good old days of Epok Epok. 


So what makes a good curry puff? My answers are:

  • Crispy and flaky dough
  • Buttery dough
  • Warm and moist filling
  • If it is Potato filling, hard boiled eggs is a must!
Well, my featured version of curry puff has of course satisfied my own criteria.  And I brought these to Boston Food swap. I would say it created a buzz among the Bostonians in the event. 

Photo from Boston Food Swap


Recipe:
A) Chicken and Potato Filling

  • 1 Chicken Breast, cut into cubes
  • 2 Large Potatoes, boiled and cut into cubes
  • 1 Red onion, diced
  • 1 handful of Cilantro, chopped
  • 1 tbsp Curry powder
  • 1 tsp Tumeric powder
  • 1 tbsp Chili paste (optional) 
  • Black pepper and salt to season
  • Cooking oil
  • Water
  • 2 Hard boiled eggs, cut into 6 segments

Steps:

  1. In a heated wok, add 2 tbsp of oil. Add in chili paste. Fry till fragrant. 
  2. Add in onions, fry until it turns translucent. 
  3. Add in chicken and fry until it turns opaque. Add in potatoes. 
  4. Add into curry powder, tumeric powder, seasoning. Stir well.
  5. Add in 1/4 cup of water. Simmer until the chicken is cooked and water dries up, approx 10 minutes.
  6. Remove from heat and set aside. 

B) Dough 


1) Water Dough

  • 450g All Purpose flour
  • 1 tsp Salt
  • 200ml water

2)  Oil Dough 

  • 200g Unsalted Butter (Softened)
  • 365g  All Purpose flour
  • Some Ice cold water

Steps:

  1. Prepare the water dough. In a mixing bowl, mix flour with salt, add in water slowly to form a dough. Adjust the water accordingly to have a pliable dough. 
  2. Wrap with plastic wrap and let it rest for 20 minutes. After which, divide the dough into balls of 85g each. 
  3. Prepare oil dough in a different mixing bowl. Mix the butter and flour together. Add some ice cold water to help to gather the dough together. Do not over knead as it may transfer heat and melt the butter. Wrap with plastic wrap and let it rest for 20 minutes in the fridge.After which, divide the dough into balls of 70g each. 
  4. Flatten a water dough ball and place a oil dough ball onto the center of water dough. Wrap the oil dough. Let it rest for 10 minutes.
  5. Roll the mixture dough into a rectangle about 18 cm x 10 cm. Roll the dough tightly into a spiral, start with a shorter end. Rest for 10 minutes. Cut it into 4 equal pieces. Repeat for the rest of the dough. 
  6. Take a piece of cut dough. Roll into a round 1/8 inch  dough wrapper. 
  7. Fill the wrapper with filling and a piece of hard boiled egg. 
  8. Seal the edges with some water. Pinch the ends. 
  9. Deep fry it in medium high heat. Remove when pastry turns golden brown. Drain from oil. 

Old Fashioned Bread Pudding with Rum Vanilla Sauce

I never like Bread Pudding (until a month ago). One of my best friends, WWW, was the total opposite. She loves it and she would zoomed right into it if it was offered in a buffet. No matter how she tried to convince me to try it, I never did. 


I was full of assumptions that bread pudding was just stale bread drowned in eggs, milk, sugar and butter. Also I was particular about the ‘nutrition’ value it will bring to my concerning waist line and ‘bye-bye’ arms. Recently, I was offered to try in a pot luck session. I had to be polite so I tried. And I am sold completely! It was so delicious that I went for 2 and 3 helpings. As I was eating, I suggested to make a few tweaks to make the pudding even better.


Here’s my version!


Recipe (Serve 4- 6 servings)
Ingredients:


A) Pudding

  • 4 cups of White Bread, cut into 2 inch squares (or any shape you like)
  • 1/2 cup Raisins 
  • 2 cups Whole milk
  • 1/4 cup Unsalted Butter
  • 1/2 cup Granulated sugar
  • 2 Large eggs
  • 1 tbsp Vanilla Essence
  • 1/2 tsp Ground Nutmeg
  • 1/4 tsp Cinnamon
  • 2 tbsp Dark Rum
Steps:
  1. Soak the raisins in rum for at least 30 minutes (overnight for best results). Drained. Set the rum aside. 
  2. Preheat the oven to 350 degree Fahrenheit. 
  3. Combine bread and raisins in a large mixing bowl. 
  4. In a medium saucepan, combine whole milk, sugar and butter. Over medium heat, melt the butter and dissolve the sugar. Do not let the milk boil. 
  5. Pour the milk mixture over the bread. 
  6. Let it stand for 10 minutes. 
  7. In a separate mixing bowl, mix other ingredients with a whisk. Stir into the bread mixture. Be gentle.
  8. Pour into a greased casserole or deep baking dish. Bake for 40 minute or until it is golden brown and set. 
  9. Remove from oven. Drizzle leftover rum over the pudding. 
B) Vanilla Sauce
  • 1/2 cup Butter
  • 1/2 cup Sugar
  • 1/2 cup Brown Sugar
  • 1/2 Heavy cream
  • 1 tbsp Vanilla essence
  • 1 tbsp Rum
Steps:
  1. Combine all ingredients except vanilla essence and rum. Cook over medium heat and stir occasionally. 
  2. When the mixture thicken and starts to boil, stir in vanilla essence and rum. 
  3. To serve, spoon warm pudding into individual plates and drizzle with warm sauce. 

Fabulous Olive and Parmesan Focaccia

I find restaurants that serve warmed bread, sincere. They provide customers something to fill their empty stomachs as soon they settle down indicates their extra effort to care for their customers. I am particularly impressed if they serve a variety of breads and allow the customers to choose from the spread. One of the breads which I look forward to is Focaccia. It is a flat Italian bread, generally softer and savory in taste. It is flavored with olive oil and salt, and often topped with herbs, cheese, olives and/or other vegetables. Because of it own flavor it is unnecessary to complement it with butter. 

This is the first time making Focaccia bread and the oven in my apartment is very old and cranky. The thermostat is highly inaccurate and insensitive. Despite with an oven thermometer to help to calibrate the moody heater, the dial reads differently after every use. Almost everyone in my building faces the same problem. Luckily, the Focaccia turned out pretty okay. 

Recipe (8 x 10 loaf) For hand kneading
Ingredients

  • 2 1/2 cups of Bread Flour
  • 1 1/4 cups of cold water
  • 1 tbsp and 1/2 tsp of granulated sugar
  • 1 tsp of salt
  • 1/2 packet of instant yeast
  • Extra virgin oil
  • 1/2 cup Pitted Olives, sliced
  • 1/2 cup grated Parmesan cheese
Steps:
  1. In a large stainless steel mixing bowl, combine flour, water, sugar, salt and yeast. 
  2. Knead all the ingredients together for 2 to 3 minutes. The dough will be sticky. To prevent your hand from sticking, wet your hands with lukewarm water occasionally during the kneading process.
  3. Let it rest for 5 minutes. Knead for another 3 minutes to achieve a smooth rounded dough. 
  4. Using a separate large bowl, grease the bowl with olive oil. Put the dough into the bowl and rotate the dough to coat it with oil. 
  5. Hold the bowl with one hand. Wet the other hand with water, grab the dough and stretch it to twice the length. Fold the stretched section back over the dough. Rotate the bowl 45 degrees clockwise. Repeat the process until you make a full 360 degrees. Drizzle 1 tsp of olive oil over the top of the dough and flip it over. Cover with plastic wrap and refrigerate overnight. 
  6. On a baking tray, lay with parchment paper and grease it with olive oil. 
  7. Drizzle 1 tsp of olive it on the dough. Place the dough in the center of the baking tray. Using fingers, gently create hollows and push the dough down and out towards the edges. Keep the dough about 1/2 inch thick. Sprinkle the sliced olives over the dough and push them into the dough. Let the dough rest for 20 minutes. 
  8. Drizzle another 1 tsp of olive oil over the dough. Using fingers, dimple the dough again and push the dough outwards to achieve a thickness of 1/4 inch. Cover the dough with greased plastic wrap. Let it rise for 3 hours at room temperature. It will rise to almost double the size.
  9. Preheat the oven to 475 degrees Fahrenheit. Put the bread to bake at the middle rack. Lower the temperature to 450 degrees Fahrenheit and bake for 10 minutes. Rotate the pan and bake for another 7 minutes. 
  10. Sprinkle grated cheese on top of the bread and bake for another 3 minutes. 
  11. Remove from oven and let it rest for 20 minutes before serving. 

Egg Benedict & Hollandaise Sauce

Egg Benedict… A sinful breakfast/ brunch item made of poached eggs and ham over English muffins, sinfully drizzled with the divine Hollandaise sauce. All faint hearted should avoid this delicious combination because the sauce is rich, buttery and creamy. You may die of a heart attack! Just joking! But well, you got to try it at least once (from a decent restaurant, or make your own!). 

Hollandaise sauce is one of the five mother sauces in the French sauces repertoire. It is difficult to make and does not keep for long. To make the sauce, you need egg yolks, butter, lemon and some seasoning. I had to get my hubby to help me during the preparation process as one has to add melted butter into the mixture while whisking it continuously. In fact, I learnt that it is good to involved your hubby in the cooking process because he will appreciate your hard work in bringing food to the table. Well, my hubby enjoyed his breakfast very much and of course he appreciated the hard work I put in. I guess it will take some time for him to request Egg Benedict again for his breakfast at home.  (In fact, the next day we tried Egg Benedict at Boston. The sauce was a let down :P)
Recipe
Ingredients:

A) Hollandaise Sauce
  • 2 Egg Yolks
  • 4 sticks of butter (2 cups), melted and clarified
  • 1 tbsp Freshly squeezed Lemon juice
  • Salt and white pepper to taste
  • Water
Steps:
  1. Simmer a pot of water over low heat.
  2. Using a mixing bowl (that is able to place over the pot of simmering water for double boiling), whisk the egg yolks over the simmering water. Whisk the eggs till it is creamy and ribbons are formed. 
  3. Remove the mixing bowl from heat, add in the butter a teaspoon at a time and whisk continuously. If the mixture becomes too thick, add some warm water. Continue to add all the butter a teaspoon at a time. 
  4. Add in lemon juice, salt and pepper. Whisk well. 
  5. Set aside. Keep the sauce warm. 

B) Egg Benedict (For 2)
  • 2 Eggs, at room temperature
  • Ham
  • English Muffins, halved and toasted
  • Asparagus, trimmed 
  • 1 tbsp White vinegar 
  • Salt and pepper
  • 1 tsp of oil
  1. Blanch the asparagus in boiling water and put it into ice bath. 
  2. In a pan with 1 tsp of oil, saute the asparagus and season with salt and pepper. Set aside.
  3. In the same pan, heat the ham (optional)
  4. In a pot of simmer water over low heat, add white vinegar. 
  5. Crack an egg into a bowl. Slide the egg using the bowl carefully into the simmering water. Let the egg poach for 3 minutes. Repeat the same process for another egg. 
  6. Using a slotted spoon, remove the poached egg. 
  7. Lay a slice of muffin on a plate, top it with ham, egg, asparagus and drizzle with a generous amount of hollandaise sauce. 
  8. Bon Appetit!

Gorgeous Sticky Sticky Buns

I was watching the Food Network sometime back while I was still in Singapore. I chanced upon an episode where they were introducing Joanne Chang’s Sticky Sticky Buns. It was so gorgeous looking and I knew I had to try one when I go to Boston. The buns were deemed so tasty that it defeated Bobby Flay’s! When I reached Boston, I had totally forgotten about it until one day I walked into ‘Flour’ Bakery and found myself staring at some golden caramelized buns. “Those buns looked so familiar” I said to myself. “Woo… they are the …” I exclaimed. So I bought one and packed it back to my apartment to share my new finding with my hubby. It was so delicious and I can tell you that I now frequent ‘Flour’. 


My new found love has prompted me to look for the recipe and get my hands busy. I did what I had to do and I am very glad for the invention of INTERNET! 

The recipe requires lots of patience and time. I did not have a mixer here in Boston so I was training my arms as I kneaded the dough.  


Recipe (For 8 buns)
Ingredients:
A) Dough
  • 175g All-purpose flour
  • 170g Bread Flour
  • 1 package Active Dry Yeast
  • 40g Fine Sugar
  • 1/2 tbsp Kosher salt
  • 1/4 cup Cold water
  • 2 Whole Eggs and 1 egg yolk
  • 155g Unsalted butter, cut into 10 small pieces
Steps:
  1. Combine flour, yeast, sugar, salt, water and eggs. Knead the dough until all ingredients are well combined and smooth. The dough will looked dry. 
  2. At this time, add the butter, 1 piece at a time. Knead the butter into the dough and add the rest of the butter slowly. It may seems impossible at first. 
  3. Once the butter is completely incorporated, continue to knead for about 15 minutes. It will look smooth and shiny. The dough will have some elasticity when you pull a piece from it. 
  4. Cover the dough with cling wrap and refrigerate overnight. 
  5. Take the dough out from the refrigerator 1 hour before use.

B) Goo and Final assembling
  • 170g Unsalted Butter
  • 345g Brown Sugar (1)
  • 1/3 cup Honey
  • 1/3 Heavy cream
  • 1/3 Water
  • 1/4 tsp Kosher salt
  • Prepared Dough
  • 1/4 cup Brown Sugar (2) 
  • 1/4 cup Fine sugar
  • 1/8 tsp Ground Cinnamon
  • 1 cup Toasted pecans, chopped
Steps:
  1. In a saucepan, melt butter and whisk in brown sugar (1). Remove from heat and whisk in honey, heavy cream, water and salt.  
  2. Set aside and let it cool for 30 minutes. 
  3. Roll the dough into 12″ by 16″ and 1/4″ thick. 
  4. In a bowl, mix brown sugar (2), sugar, cinnamon and 1/2 of the pecans. Sprinkle this mixture onto the rolled dough. Ensure it is evenly spread out. 
  5. Using your fingers, roll the dough (like a swiss roll) from one side to the opposite side. Start with the long side. 
  6. Use a knife and cut the roll into 8 equal parts. 
  7. Pour the goo into a baking tray (make sure the tray is at least 2 inch high). 
  8. Sprinkle the rest of the pecans over the goo. 
  9. Arrange the buns in the baking tray in 2 rolls of 4s. 
  10. Cover with cling wrap and let it proof in a warm place. It should double the size.
  11. Preheat the oven to 350 degrees Fahrenheit.
  12. Bake the buns unto golden brown, about 35 minutes. 
  13. Let the baking tray cool for 20 minutes. Remove the buns and invert them on a serving plate. Spoon extra goo and pecans over the buns. 
  14. Enjoy!

Recipe is adapted from Food Network.

    My Favourite Sausage / Hot dogs Rolls

    Do you have a favourite item at the bakery? 

    When I was young, my mum would bring my siblings and I to the bakery frequently. We always bought the same baked items. I love sausage rolls, my sister liked ham buns and my brother adored Red bean buns (I am not sure if they still like what they used to :P). So when our parents bought some bread home, we know they got what we wanted. Sometimes my brother and I would get into fights when he ate my sausage rolls. Yes, it was very ‘territorial’. 

    How would you enjoy a sausage roll?
    Option 1: Eat the bread and sausage in organized bites
    Option 2: Eat the bread and followed by the sausage
    Option 3: Eat the sausage and followed by the bread

    And I choose option 2! Save the best for the last, yea? 

    I am glad to find this recipe online and I can bake them in my kitchenette. But just one simple advice, stick to your favourite brand of sausages. I bought 98% fat-free turkey sausages from a local supermarket but was utterly disappointed with the taste as they were way too salty.  

    Recipe (Makes 8 sausage rolls)
    Ingredients: 
    Part 1:

    • 300g Bread Flour
    • 1 package of Instant Dried Yeast
    • 10g Sugar
    • 6g Salt
    • 30g Unsalted Butter, Softened and cut into small cubes
    • 1 egg 
    • 170 – 180g Whole Milk 
    Part 2:
    • 1 egg and 2 tsp of water for egg wash
    • 8 sausages, washed and patted dry
    • 1 tsp Butter
    Steps:
    1. In a mixing bowl, mix bread flour, dry yeast, sugar and salt well. 
    2. In a separate bowl, mix milk and egg together. 
    3. Add milk mixture into the dry ingredients. Mix well using a spatula. 
    4. Using hands, remove the dough and knead on a lightly floured surface. Knead until the dough is tender and elastic. About 10 minutes. 
    5. Add in the butter into the dough and knead for another 10 minutes or until the dough is soft, smooth and stretchable. Make sure the butter is well blended in.
    6. Put the dough in a lightly buttered bowl. Cover the dough with a damp cloth. Let it rest for 1 – 1.5h or till size doubles. (I let it rest in a 90 deg Fahrenheit oven with a tray of warm water).
    7. Deflate the dough with your fist. 
    8. Divide the dough into 8 portions. Roll the balls in your clenched hands against the table top till the dough smoothed. 
    9. Cover them with damp cloth and let them rest for 10 minutes.
    10. For each portion, roll them into 25 cm long ropes. Using the elongated dough to wrap a sausage. Leave 3/4 inch of each ends of the sausage unwrapped.  
    11. Lay the sausage rolls on a baking tray. Cover with damp cloth and let them rest till the dough doubles.
    12. Preheat the oven to 200 deg Celsius / 390 deg Fahrenheit.  
    13. Brush the dough with egg wash. 
    14. Bake the rolls for 12- 15 minutes or until the dough is light golden brown.
    15. Rub the rolls with a little butter to achieve a shine.


    The recipe is adapted from http://food-4tots.com

    Rosemary Dinner Rolls

    Picture this! “You coming out from your kitchen with a basket of freshly baked Rosemary Dinner rolls, walking towards your family seated at the dinner table who is in awe with the aroma of fresh bread, scented with Rosemary leaves. You see their faces printed with in their widest smiles!” Beautiful scene isn’t it?
    Okay, it is time now to get the ingredients and get busy! Make the delicious Rosemary Dinner rolls TODAY!


    As I do not have a mixer with me in Cambridge, I have to knead with my hands. The beautiful thing for the recipe is that it works with hands and machine! Do not be put off by kneading if you do not own a mixer. In fact, I find it therapeutic! 

    Recipe (14 rolls) 
    Ingredients:

    • 1 package of yeast
    • 1 cup lukewarm water
    • 2 tbsp vegetable/ olive oil
    • 1 Egg
    • 3 tbsp Sugar
    • 3 1/4 cup Flour
    • 1 tsp Salt
    • 2 tsp Fresh Rosemary, chopped (1 tsp Dried Rosemary can be used instead)
    • 1 tsp Sesame seeds (Optional)
    • 2 tbsp melted butter
    Steps:
    1. In a mixing bowl, add lukewarm water and yeast together. Let it rest for 10 minutes. You can observe foam will form after 5 minutes. 
    2. Add in oil, egg, sugar and rosemary leaves. Mix well.
    3. Add in flour 1 cup at a time and mix it with a spatula. 
    4. When dough starts to form, use hands to knead until dough is clean the sides of the bowl and dough is smooth. Takes about 10 minutes. 
    5. Cover the bowl with a clean and damp towel. Let the dough rest for 20 minutes.
    6. Add in salt and knead for 5 minutes. Transfer the dough to a greased bowl and cover it a damp towel. Let it rest for  about 1 hour or until it doubled in size. 
    7. Grease a 9 inch baking pan. 
    8. When the dough is ready, divide the dough into 14 pieces on a lightly floured working surface. 
    9.  Roll the pieces into rounds and place them in the greased pan. 
    10. Cover the pan with a clean and damp towel. Let the dough rest for 30 minutes. It should expand to fill to the pan. 
    11. Preheat the oven to 350 degree Fahrenheit (180 degree Celsius). 
    12. Brush the rolls with melted butter, sprinkle with some rosemary and sesame seeds. 
    13. Bake for 20 to 30 minutes, golden brown. 
    14. Remove from oven and brush with remaining butter. 
    15. Serve warm.

    Adapted from jasonandshawnda.com